Yoga for Tunnel Flyers
Tunnel got you Stiff???
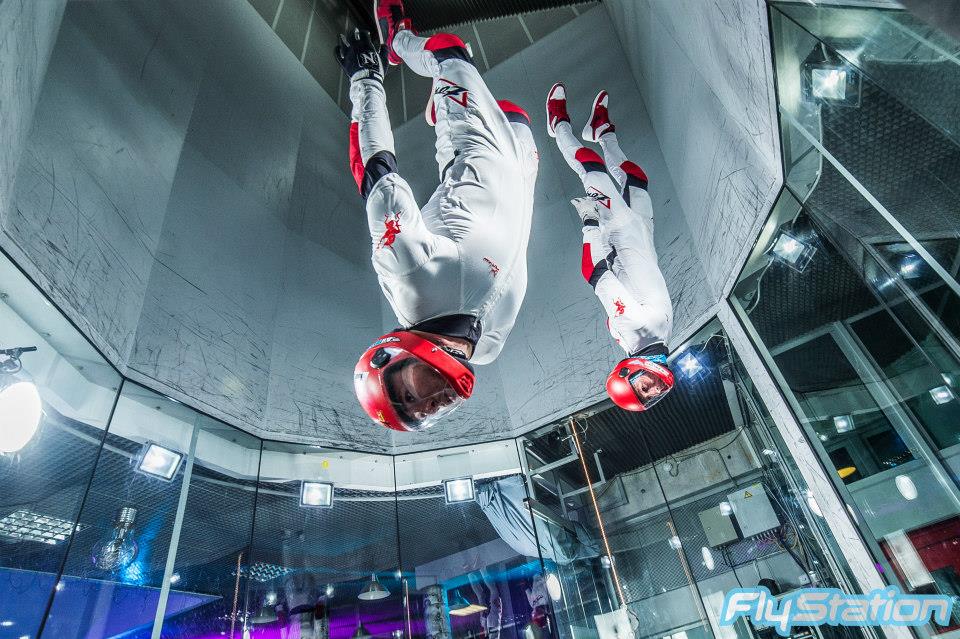
Whether you’re a belly flyer, VFS or dynamic flyer…if you fly in the tunnel it’s likely you have felt your body in no other way before! … The first time I flew in the tunnel I could barely walk the next day! As with most sports, the more you practice the more you condition yourself. Gradually, you will start to use less unnecessary strain… However, until that point the tunnel is hard work on the body! Whatever type of flyer you are, if it’s every now and again or every day, learning how to balance the effects of tunnel flying on the body is important, not only to keep you loose and more mobile in the tunnel but also to help avoid injury, so that you can keep flying safely and keep having fun with your friends.
If you are a tunnel flyer, you know that machine doesn’t just challenge your body but also your mind and your emotions. Learning some basic stretching and strengthening exercises along with simple breathing techniques can support your flying and dramatically change the way you think and feel on the inside, whilst maybe going for that first front layout, attempting a new trick, or competing in your first 4 way comp.
As an alignment yoga teacher of 14 years, skydiver, snowboarder, acrobat and seriously addicted tunnel flyer…(I mean..seriously… anyone wanna go fly????) The human body and its immaculate movement absolutely fascinate me…. If we consider for just a moment the things we have asked our bodies to do over the years…it’s amazing in tact! One thing I have learned over the years, is that if you want your body to keep doing what you love doing, you NEED to take care of it… and ACTIVELY do something in order to make that happen. (don’t just keep saying to yourself “I need to stretch” … Actually stretch!! You’re right! You will feel better for it!)
As a flyer, whether you flex at the hip or extend, whether you open the chest or close, whether you’re a boxman or a mantis… In general, you need to stretch and open your front body and stretch and strengthen your back body….
Tunnel body positions, techniques and ideas are constantly changing, as our personal skill levels increase and the sport itself, evolves and improves … I have been studying various tunnel flying body positions and have taken some time to think about what basic exercises would compliment the variety of flying techniques and which ones can easily be practiced at the tunnel before and after flying.
Here is a 10 minute session just for you
SHOULDERS & NECK
You carry the world on your shoulders and something the size and weight of a bowling ball on top of your neck. No wonder you get a little stiff and sore now and then…. smashing your head into the tunnel wall doesn’t help either!
The neck and shoulders take a lot of physical stress and abuse, turning, nodding, bobbing, jerking, lifting, hunching and straining all day long….In the tunnel, the neck is often in a state of hyper flexion as we attempt to lift the chin to spill more air…or look over a shoulder to see where we are going. Neck and shoulder problems are among the most common injuries… in and out of the tunnel. In addition to physical injury, we carry a lot of stress and tension in out necks and shoulders.
The following simple exercises can help relieve stiffness and tension, and help strengthen the neck and shoulders.
NOTE: Please be careful when working with your neck and shoulders. Move slowly and deliberately. Pay attention to which muscles are being used. Never go beyond your edge of comfort. This isn’t a workout, test or competition…. it’s to make you feel good before and after your tunnel session!!!!
- Chin to chest. Inhale and as you exhale slowly lower your chin to your chest creating a long stretch along the back of the neck. Do not round the upper back, but instead, draw the shoulder blades down the back and broaden the shoulder blades, as the chin comes down. Take several deep breaths… On an exhale lift the head back up.
- Ear to Shoulder. Bring the left arm across the chest (hook the right arm under the left arm and draw the arm closer to the chest. Inhale and as you exhale, lower your right ear toward your right shoulder. Keep the shoulder blades drawing down the back and broad. Breathe into the stretch created along the top of the left shoulder and left side of the neck. Take several deep breaths. On an exhale raise your head back up. Repeat on other side.
- Neck roll. Follow the instructions for ear-to-shoulder, then roll the chin down toward the chest, across the chest and up the other side. Inhale and as you exhale roll the chin down across the chest and up the other side.
- 45 Degrees Turn the head to 45 degrees to the right… Inhale and as you exhale lower your chin toward your right armpit. (put the right hand on top of the head but don’t pull), Keep the shoulder blades drawing down the back and broad. Breathe into the stretch created along the top of the left shoulder and neck. Reach the opposite arm away from you to increase the stretch. Take several slow deep breaths. On an exhale raise your head back up. Repeat on the other side.
- Shoulder circles & GHR (Gleno-Humeral Rhythm) .
Shoulder Circles – Raise your shoulders up, rotate them back and down, forward and up again. Repeat several times then go in the opposite direction.
GHR – Inhale and as you exhale, internally rotate the upper arm bones and stretch between the shoulder blades. Inhaling, externally rotate the upper arm bones and at the same time draw the shoulder blades down the back and broad pressing the shoulder blades strongly into the back body to open the chest. Repeat several times until arm bone and shoulder blades move in fluid rhythm.
- Spinal Flexion/ Extension/Natural Lumbar curve – Arching/De-Arching/Neutral. Come to hands and knees position with hands under shoulders, fingers spreading, knees under hips, pelvis not tipped forward or back “ Neutral”. natural curves in spine).
Inhale in neutral position, on an Exhale – Release the head down, press spine towards ceiling (lifting the front body up into the back body), sit bones down toward floor (this will backward tilt your pelvis)
Inhaling – lift head up, lower the spine and open the chest by externally rotating the upper arms drawing the shoulder blades down the back and broad. Forward tilt the pelvis to come to neutral. (do not collapse lumbar spine).
(Continue back and forth with the breath)
- Chest opener + Front body stretch (arms behind you on bleacher or chair seat)
(If too intense on knees can do standing with arms back on railing) Maintain a neutral pelvis throughout) Keep lengthening the arms to the wall behind you as you lift your sternum up to stretch the chest. – Whilst opening the chest, lift the pubic bone up towards the navel (like doing up your zipper), this will help maintain your neutral pelvis as you increase the stretch on the front body.
- Upper back/shoulders
Internally rotate the upper arms. Cross the elbows completely. Bottom hand flat (like holding a cocktail tray) top hand meets the bottom hand . (do not clasp the hands, instead stretch through the fingers) Keeping the pelvis neutral, as you lift the elbow up away from the chest attempt to externally rotate the upper arms you draw your shoulder blades down and broad. Keep lifting the base of the skull and lengthening the neck. Open the arms wide and repeat on other side – other arm crosses underneath)
9.Chest/Shoulder Stretch /Strength – Elbows on chair seat
With elbows on chair, walk the knees back, bring the torso parallel to floor, rest the forehead on the edge of the chair seat. With the arms straight on the chair seat, strongly externally rotate the upper arm bones the whole arm and hands until the little fingers are side by side and the back of the hands are on the chair. Reach the thumbs out in direction of sidewalls. Draw the shoulder blades down the back and broad as you press them strongly into the back body to open the chest more. Soften the face eyes etc Breathe!
To come out, internally rotate the arms, bend elbows, walk knees toward chair, and use arms to lift torso out of the position and sit on heels.
Seated twist
Sit up tall by lifting the collarbones and all sides of the torso equally. Lift the base of the skull. Keep your pelvis neutral throughout and your head aligned over your pelvis. Inhale and on an exhalation…start the turn below the naval (keep creating lift in the spine throughout). In small increments, continue to turn progressively from navel (lumbar spine) then the ribs (thorasic spine), shoulders, then head (cervical spine), Press the shoulder blades (specifically the lower tips of shoulder blades), strongly into the back body to turn the chest more. Breathe!
To come out maintain the lift of the torso and return to center sequentially from the waist, the ribs, the shoulders, then the head.
…HAVE FUN FLYING!!
LEGS & HIPS
Again, no matter what body position you fly in, the leg and hip muscles will be engaged or in some level of contraction … therefore, you need to stretch your legs!!
Why….? When the muscles of the legs get very tight and/or weak this is not only uncomfortable and sometimes painful, but more seriously, can contribute to potentially avoidable back pain, hip and knee dysfunction.
In the tunnel we use these big leg and hip muscles without thought. For example, pressing the lower legs just enough when belly carving, standing, sitting or back flying … you name it, your legs should be working!
The large legs muscles along with the rotators of the hip support the pelvis, which supports the spine (hip bones connect to ya thigh bone etc)
Excessive tension of major muscles can therefore distort the pelvis – restricted mobility of the pelvis will negatively affect the natural curvatures of the spine. If you stretch and strengthen your legs you will access more freedom in your back.
Remember that less is more… if you stretch to a point that you are straining or holding inside, you will be fighting yourself (the same thing applies in the tunnel right?) Learn to use just the right amount of effort and balance that effort with ease …BREATHE!!!!
- Hamstring Stretch – “Wall Push”
At the wall. Hands at shoulder height. Press hands into wall as you walk legs back, hinge the trunk until torso is parallel to the floor. Align the hips over the ankles. Start with knees bent, practice straightening the legs by pressing down thru the feet while lifting the sitting bones. Keep the shoulder blades broad and the arms and side waists lengthening throughout
- Standing Quad stretch at wall:
With ankle in hand…other hand on wall for balance. close the knee joint completely. Knees aligned. Neutral Pelvis. Reach the bend kneecap down towards the mat as you lift the front hip points up to increase the stretch.
- Wide standing Forward Fold –Inner thigh stretch
- Standing Squat – Hips sockets /Rotators
- Squat Variations
Against the wall. Standing at the wall with feet hip width apart, keep the sacrum on the wall as you slide down and Squat! Knees track directly over the toes. Keep the sacrum, shoulders and head on the wall. Slide the base of the skull up as you sink you hips down.
- ½ Splits – Hamstrings
- Deep Lunge – Hip Flexors
Come to kneeling lunge position. Set the foundation and place the hands onto the front thigh. pull traction the spine lifting all sides of torso equally, press the shoulder blades from back body to front body to open the chest.
Hip and Chest opener
- Hip opener – “Helmet SLIDE” Sit on edge of the chair. Feet turned out 90degrees. Keep the knees back by pressing in to the bp of the feet and lifting the inner arches of the feet. Do not force the knees back, instead use the grounding of the foundation to stabilize the legs. Maintain the actions of the feet and the position of the legs, create a natural lumbar curve by dog tilting the pelvis as you forward fold at the hip creases, bringing the hands to the block. Find a way to maintain the actions of the pelvis feet and ankles and at the same time release the grip of the buttocks, buttock flesh down towards the chair.
To come out –Lengthen the spine , slide the block towards you, hands onto the thighs for support, turn the feet forward, continue to press in to the bp of the feet, continue to lift the arches of the feet as you lift the torso to sitting.
- Seated Simple Hip stretch
Bend Knees. Squeeze the right knee into the chest closing the knee joint completely. Flex the right foot. rotate the femur externally (out away from you) and place the foot on the left thigh. Align the toes with the knee. Keep the foot flexed. Take hand to hip crease and use the hand to help externally rotate the leg more. For more stretch.. hinge at the hip creases (tilting the pelvis forward over the legs) Soften the groins. Keep the chest and shoulders open (do not round the back).
- Seated twist
Hands on back of chair – palms open to assist in creating lift and traction of the spine by pressing open palms downward. Sit up tall by lifting all four sides of the torso equally. Lift the base of the skull. Soften the groins, allow the groins to drop inward and downward, Maintain the lift in the back body, soften the neck, eyes tongue etc… To turn to the right, on an exhalation…start the turn below the naval as you press into the palms to create lift. In small increments, continue to turn progressively up into the thoracic spine, begin to engage the shoulder blades specifically the lower tips of shoulder blades pressing from back body to front body, use the action of the shoulder blades to turn the chest more, lead with the heart let the head follow… base of the skull is lined up over the sacrum. turn the head from the mid thoracic spine, eyes turn last soft in their sockets. (The shoulders and head act as one unit if the neck/head turns from the mid-thoracic.)
To come out – Continue to press into the palms maintain the lift on all sides of the torso as you slowly come back to the center. Turning waist, ribs. Shoulders, head then eyes turn last. Pause (soak) Repeat other side.
CORE (FRONT BACK AND SIDES)
Ok… so we need our arms and legs to take grips, steer, and drive etc… but our biggest wing is of course our trunk, aka “The Core” which consists of the Front the Back AND the sides of the torso.
When flying, your trunk arches, de-arches, twists and bends… and sometimes it manages to do some other funky stuff too…
Bringing a balance of strength and flexibility to the muscles of the core WILL help you fly better. Not only will you have more power and ease in the tunnel due to the fact that you are now able to access your largest flyable surface area, but you will also have more stamina during your sessions (and less shoulder pain!) as you free up your limbs.
It is important to balance your core not just so you can fly better but for the health and safety of your spine and other joints. The extreme arching of the lumbar spine, the twisting and turning of the neck with the addition of the occasional wall/teammate impact can be really painful and if not taken care of may lead to avoidable injuries in the future.
Maybe you have noticed… your core resides between your pelvis and your shoulder girdle…if there is dysfunction in these areas it will effect your core. Keeping the pelvis neutral and the shoulders girdle balanced, whilst working your core, is extremely important to ensure you stretch and strengthen the appropriate muscles that support the spine. (see Blue skies mag Dec & Jan issues for shoulder and hip techniques and exercises).
Points of Alignment To Balance the Core…
Neutral Pelvis = Pelvic rim level, natural lumbar curve
“Zipper up” = lifting the pubic bone up towards the navel (like you are doing up your zipper on a tight pair of jeans! Do not squeeze the butt!)
Side waists = Lift both sides equally
Balanced Shoulder girdle = external rotation of upper arm bones, shoulder blades down the back and broad and pressing strongly into the back body, front ribs in and down
Containing the front body = “zipper up” Front ribs in and down toward zipper
Work all the above points of alignment “just enough” to create equal lift and support on all 4 sides of the torso. Breathe!
- Cat/Dog
Come to hands and knees position with hands under shoulders, fingers spreading, knees under hips, pelvis “ Neutral”. Inhale in neutral position, exhaling, release the head down, press spine towards ceiling (lift the front body up into the back body) sit bones down toward floor (backward tilting the pelvis) Feel the stretch on the back body.
Inhaling – lift head up, lower the spine and open the chest by externally rotating the upper arms drawing the shoulder blades down the back and broad Forward tilting the pelvis to neutral. (do not collapse lumbar spine). Pull length on the side waists and Feel the stretch on the front body (Continue back and forth with the breath)
- “Step hang”
Using stairs as a prop, reach to the highest step (feet still touching the floor) Keep the pelvis neutral and the shoulders balanced over the pelvis. Start to bend your knees as you sink your hips down towards the floor and “hang” from the step. As you release the weight of your hips allow gravity to do the work… you should feel a stretch from under the armpits and all the way down the side waists.
- Standing carve
Stand in front of a railing, hands hold the railing for balance. Stand equally on your legs. Pressing downward thru the feet to anchor the stretch, at the same time draw the shoulder blades down the back and press them strongly into the back body to lift and open the chest,. Keep the “zipper” up as the chest lifts upwards toward the sky and the feet press down, lift the side waists equally and feel the stretch over the entire front body.
- Squat Hang off railing
Take hold of the railing. Feet hips width apart. Squat, dropping the hips towards the floor and “hang off the railing” (let arms be straight don’t hold yourself or bend elbows) Step the feet up onto the bottom railing to get even more hang. “cat” the back and feel the stretch on the back body and sides.
- Triangle
Step out wide, hands on the hips. From the Femur bone externally rotate the whole leg towards the railing.. Align the knee cap with 2nd toe. (next to big toe)
Bring the front hand to the railing… Bring attention to the torso – all fours sides of the torso parallel and lengthening equally.
Press into the front foot while, lengthening the leg up into the hip socket, reach the front sitbone towards the back wall tipping your pelvis sideways over the front leg. Engage the action of the shoulder blades, continue to lengthen both sides of the torso equally.
To come out press down into the feet strongly bring the front hand to the front thigh, keep the legs strong and lift the torso to standing, parallel feet. Do other side
- Wide standing Forward fold
Step out wide. With hands on the hips, with a straight spine, forward tilt the pelvis and bring your hands to the floor. Keeping the hips aligned over the ankles, walk the hands forward as far as you can lengthening all sides of the torso equally. For more stretch, Press the top of the femur bones back towards the wall behind you as you inch your fingers forward. Feel the stretch on all sides of the torso and the legs. To come out, walk the hands back under the shoulders, hands on the hips, pressing down in to the feet tip the pelvis backward as you float your torso up to standing.
- Deep lunge/Psoas stretch
Come to low lunge position, right foot forward. Place both hands onto the front thigh. Pressing into the hands lift all sides of the torso equally. Keep the pelvis neutral by lifting the “zipper up”. As you raise the left arm by its ear (shoulder blades down away from ears and broad) reach the finger tips up towards the sky lengthening the side waist. Keep lifting all sides equally as you slowly lean back. Sitting bones reach down towards the floor, front hip bones up. Do the other side.
- Twisting lunge
Come to low lunge position. Right foot forward. Bring the left hand to the floor inside the front foot. Bring your right hand to your left waistline. Use your right hand to turn the trunk towards the front thigh, from the waist. The ribs. The shoulders and lastly raise the arm (if this is uncomfortable for the neck place the right hand on the right hip. Keep lengthening all sides of the torso equally. Lift the ”zipper” up to increase the stretch. To come out sweep the top arm up, over and down to the floor as you rotate back to center from the waist, ribs, shoulders, head.
- Lifting opposite limbs
Lay on your belly arms extended by the ears. Roll upper inner thighs towards each other and up to the sky (internally rotating the thighs) Externally rotate the upper arms shoulder blades down and broad. Keep the “zipper up” throughout. On an exhale in one smooth motion lift the right arm and left leg (cross body action) As you lift be sure to keep reaching the arm forward and the leg back to create dynamic resistance. NOTE: think about creating length rather than height – As you inhale lower the limbs, with the next exhale lift the opposite sides.
10 Forearm Plank
Set up by a wall so you can press the feet into the wall. Come on to your forearms, Elbows directly under the shoulders. Keep the pelvis neutral and chest open -do not round the upper back – instead work the actions of the shoulder blades to open the chest. “zipper up” front ribs contained. For more strength work, slide forward in the direction of your hands and then back (stay in a straight line, do not dip or round)
Don’t forget! Let the breath be your barometer, if you have to hold your breath you are working too hard, You should be able to action the body “just enough” to create support and opening on all sides of the torso whilst maintaining a fluid breath in and out of the nose.
For a complete tunnel sequence… Use exercises from the shoulder and hip issues in addition to the core work and you will feel your body move closer towards alignment.
This will help improve your posture and body awareness in and out of the tunnel.
Be sure to include adequate hydration and nutritious food in order to get the most out of your body, mind and your flying.


There are 2 comments on this post
A wonderful serenity has taken possession of my entire soul, like these sweet mornings of spring which I enjoy with my whole heart. I am alone, and feel the charm of existence in this spot, which was created for the bliss of souls like mine.
A wonderful serenity has taken possession of my entire soul, like these sweet mornings of spring which I enjoy with my whole heart. I am alone, and feel the charm of existence in this spot, which was created for the bliss of souls like mine.